
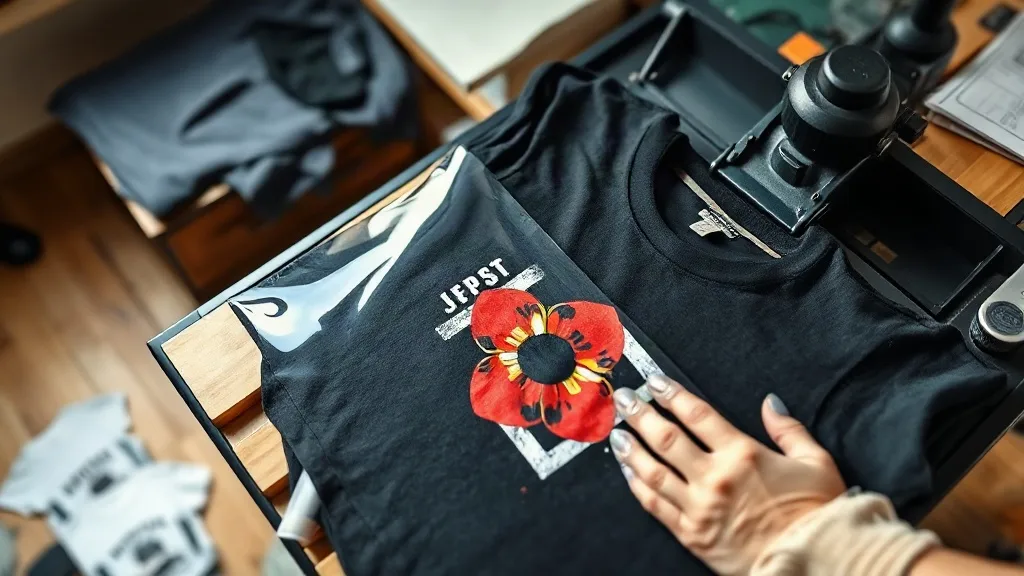
Walk into any weekend market and you will notice something: the shirts look sharper than they used to. Full-color gradients, photo-realistic graphics, tiny type that stays legible. A lot of that shift comes down to dtf transfers, a printing method that took maybe two years to go from niche to near-default in small apparel operations. If you are printing shirts for a brand, a team, or a family reunion, understanding how this process actually behaves saves you money and a lot of ruined blanks.
This guide is not a sales pitch. It is what I wish someone had told me the first time I loaded a transfer onto a heat press and watched the carrier film curl at the corner. We will cover how the transfer is built, which fabrics accept it, how to press it correctly, and the mistakes that show up six washes later.
What Is a DTF Transfer, Exactly
DTF stands for direct to film, and the name describes the route, not the destination. A printer lays water-based pigment ink onto a special PET film, then applies a hot-melt adhesive powder over the wet ink. That powder fuses into the design under heat, creating a layer that can later be bonded to fabric. The film is the delivery vehicle; the adhesive is what actually grabs the garment.
That extra step is why dtf behaves differently from direct-to-garment printing. DTG prints straight onto a pretreated shirt, which means the shirt has to be cotton-heavy and the print head has to be perfectly dialed in. With film, the printing and the pressing are two separate jobs that can happen in two separate places, days apart. You can order a hundred transfers, stack them in a drawer, and press them only when an order comes in.
How the Layers Stack Up
A finished transfer is a sandwich. From bottom to top: the PET carrier film, the printed ink layer, and the adhesive powder layer. When you press it, the adhesive melts into the fabric fibers while the ink sits on top. Peel the film and the ink stays behind, bonded by that adhesive. The result is a print with a soft hand and a slight stretch, which is why it survives on knitwear far better than older plastisol-style transfers.
Why Small Shops Switched
Three practical reasons keep coming up when I talk to people running one or two presses out of a garage.
- No minimum color count. A twelve-color photographic design costs the same to print as a two-color logo. Screen printing punishes complexity; film does not.
- No pretreatment ritual. You skip the spray-and-dry cycle that DTG demands, which also removes a whole category of user error.
- Storage is simple. Transfers keep for months in a cool, dry place. You are not racing a shelf life the way you are with pretreated blanks.
The tradeoff is per-unit cost. For a large run of a single one-color design, screen printing still wins on price. Film makes sense when designs change often, runs are small, or the artwork is too detailed for screens to be economical.
Fabric Compatibility: Where It Works and Where It Struggles
This is the part that trips people up most. The adhesive bonds mechanically to fibers, so surface texture and fiber content both matter.
Excellent Results
Cotton, cotton-poly blends, and most ring-spun knits take transfers beautifully. The smooth surface gives the adhesive full contact, and the slight stretch of the fabric matches the stretch in the print. This is also why blank selection deserves real attention. A heavyweight, tightly knit tee presses more predictably than a thin, slubby one, and brands like shaka wear have become a common pick for exactly that reason: consistent weave, dependable shrinkage behavior, and a surface that accepts adhesive evenly across the panel.
Workable With Adjustments
Polyester is fine, but you need to lower the press temperature and watch for dye migration. Dark polyester can bleed its color into a light print over time, especially under heat. A lower-temperature adhesive or a migration-blocking underlayer solves most of it.
Poor Candidates
Nylon, coated water-resistant fabrics, and heavily textured materials like coarse canvas or ribbed fleece give inconsistent adhesion. The adhesive cannot reach enough surface area, and you end up with edges that lift after a few washes. If a customer insists, test on a scrap piece first, always.
Pressing Steps That Actually Hold Up
Every press is a little different, so treat these as a starting point and adjust from there. The numbers below are what most shops land on after some trial and error.
- Pre-press the garment. Five to seven seconds at full pressure to remove moisture and flatten the weave. Skipping this is the single most common cause of poor adhesion.
- Place and press. Medium to firm pressure, roughly 150 to 160 degrees Celsius, for 12 to 15 seconds. Too hot and the film wrinkles; too cool and the adhesive never fully flows.
- Peel cold or warm, not hot. Hot peel is fast but risks stretching the print. Warm peel, a few seconds after lifting the platen, gives a cleaner edge.
- Post-press with the design covered. A second short press over parchment or a Teflon sheet locks the adhesive in and smooths the texture.
One detail people miss: pressure matters as much as temperature. A press that reads 160 degrees but applies half the needed force will produce a print that looks fine and fails in the wash. Check your press with a pressure gauge or a simple test print on scrap before committing to a customer order.
Durability: What to Expect After Washing
A correctly applied transfer on a compatible fabric should hold up for the life of the garment under normal washing. In practice, most failures trace back to one of three causes: insufficient pressure, insufficient time, or a fabric that never bonded properly in the first place.
Care instructions are worth printing on a hang tag. Turn the garment inside out, wash cold, skip the fabric softener, and tumble dry low or hang dry. Fabric softener is a quiet killer because it coats fibers and gradually weakens the adhesive bond. If a customer complains about cracking after two months, ask how they wash before assuming the transfer was faulty.
Reading the Signs of a Bad Press
Edges that lift first usually mean uneven pressure. Fine cracks across a large solid area often point to under-curing or a print applied to a fabric that stretched during pressing. A cloudy or dull finish suggests the film was peeled too hot. Each symptom points to a specific fix, which is why keeping a log of your press settings for each fabric type pays off quickly.
Ordering Transfers Without Getting Burned
Supplier quality varies more than the marketing suggests. Before committing to a bulk order, request a sample and put it through a real wash cycle twice. Check three things: color accuracy against your file, edge sharpness on small text, and how the adhesive layer feels. A gritty or uneven powder layer signals a rushed production run.
Also ask about gang sheets. If you have several small designs, consolidating them onto one sheet cuts cost significantly and is one of the quiet advantages of film printing for anyone selling on marketplaces where designs rotate constantly.
Frequently Asked Questions
Can I use DTF transfers on 100 percent polyester athletic wear?
Yes, with a lower press temperature and a watchful eye on dye migration. Light-colored prints on dark polyester are the riskiest combination, so test a sample and consider a blocking underlayer if the fabric is heavily dyed.
How long can I store unused transfers?
Roughly six to twelve months in a cool, dry place away from direct sunlight. Humidity is the enemy; the adhesive powder can clump if the storage area gets damp, which leads to patchy bonding.
Do I need a commercial heat press, or will an iron work?
An iron can produce a wearable result on a flat cotton tee if you apply steady, firm pressure for the full duration and cover the design with parchment. It is not reliable for volume work or for stretchy fabrics, where consistent pressure across the whole print is essential.
Why did my transfer peel off after the first wash?
In most cases the fabric was not pre-pressed, the pressure was too light, or the peel happened while the print was still too hot. Re-press a failed area with a cover sheet to see if it re-bonds; if it does, the original press settings were the problem.
Is DTF cheaper than screen printing for small orders?
Usually yes, once you factor in setup costs. Screen printing carries per-color setup charges that dominate small runs, while film printing has no color-count penalty. The crossover point depends on your design and quantity, so price both for any order above a few dozen pieces.